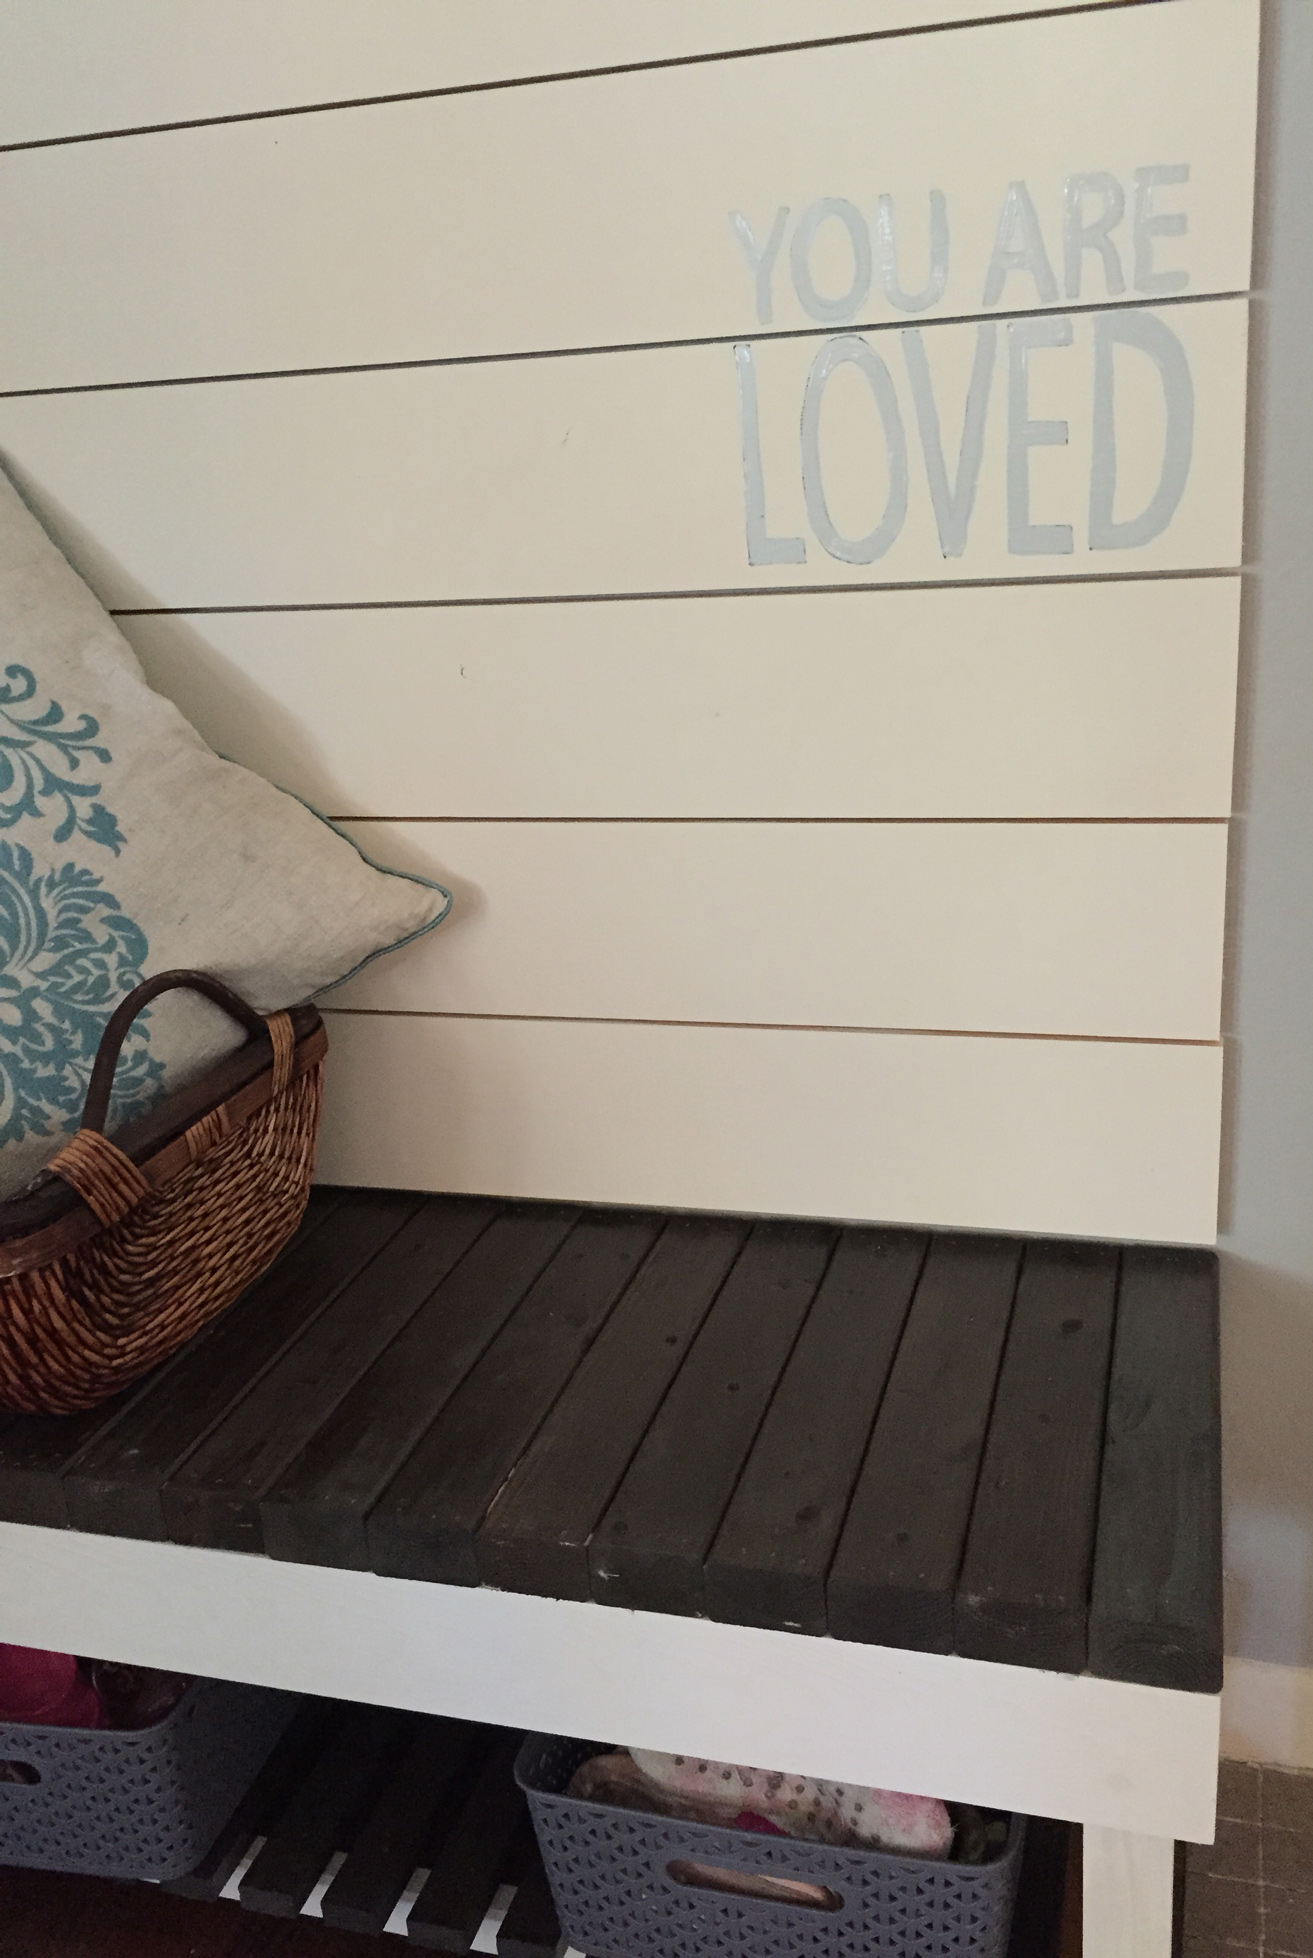
Plank Wall Bench
Today's write up is on the Bench we built for the Entry Plank Wall we created for a client.
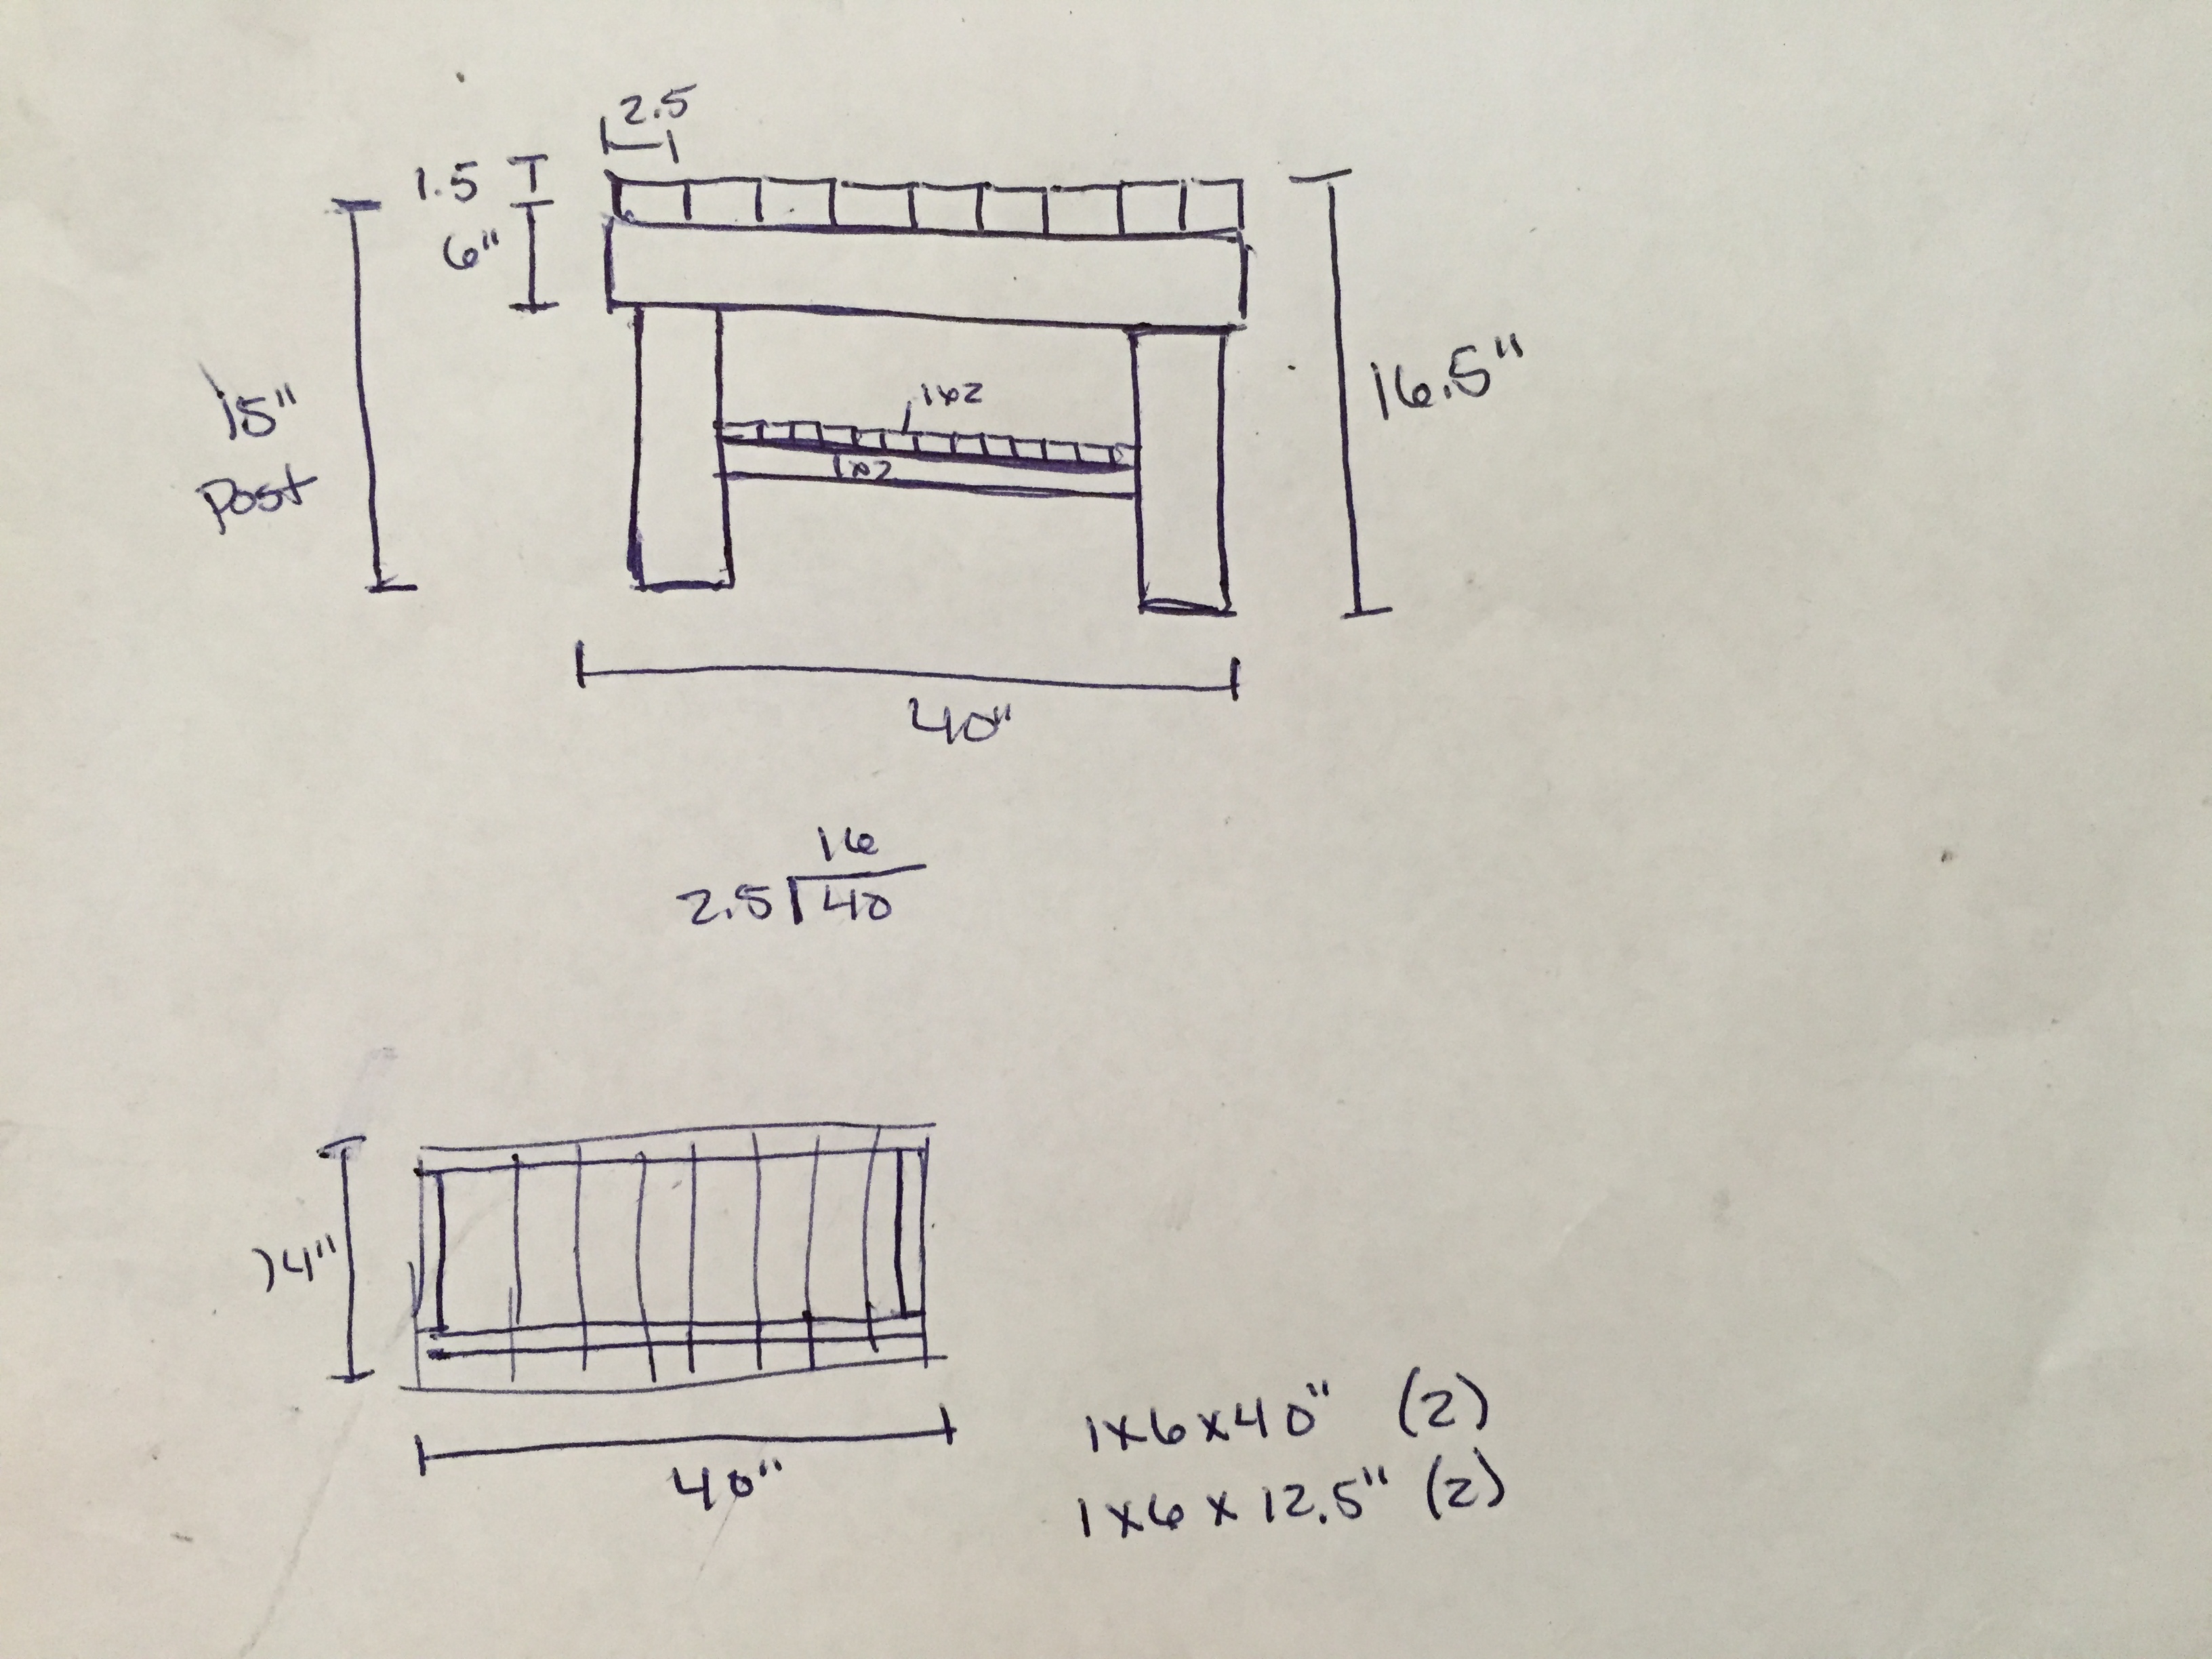
The first step was to think about the size. The client wanted something on the shorter end for height, so that it would be easy for kids to use but also easier for an adult to bend down and lace up. Typical bench heights are 16-18", so we choose to stick with the 16.5" height. The allocated space for the plank wall and bench was 40" so that became the desired length for the bench. The depth did not need to be the standard chair depth, because most people will be leaning forward on the bench to bend down, so we choose to build a 14" deep bench.
(Note: the length will also be determined by the size of the material you use for the top. We used 2x3, and when we layer it out, we were able to use whole pieces for the top, you don't want to end with one that you have to cut down.)
Materials.
We used a standard pine. We knew we would white wash it and wanted it to match the plank wall installed.
Qty.
3 2x3x8' Pine Planks
2 3x3x3' Square Edge Furniture Posts (found with table legs)
3 1x2x8' Pine Planks
1 1x4x8' Pine Plank
1 1x4x6' Pine Plank
Paint (color of choice diluted with water), stain/poly combo
Cut List.
2x3 Pine Planks -----------> 16 pieces cut to 14" each
3x3 Square Edge Post --> 4 pieces cut to 15" each
1x2 Pine Planks ----------> 15 pieces cut to 12" each
1x2 Pine Planks----------> 2 pieces cut to 38.5" each
1x4 Pine Plank------------> 2 pieces cut to 40"each, 2 pieces cut to 12.5" each
Steps.
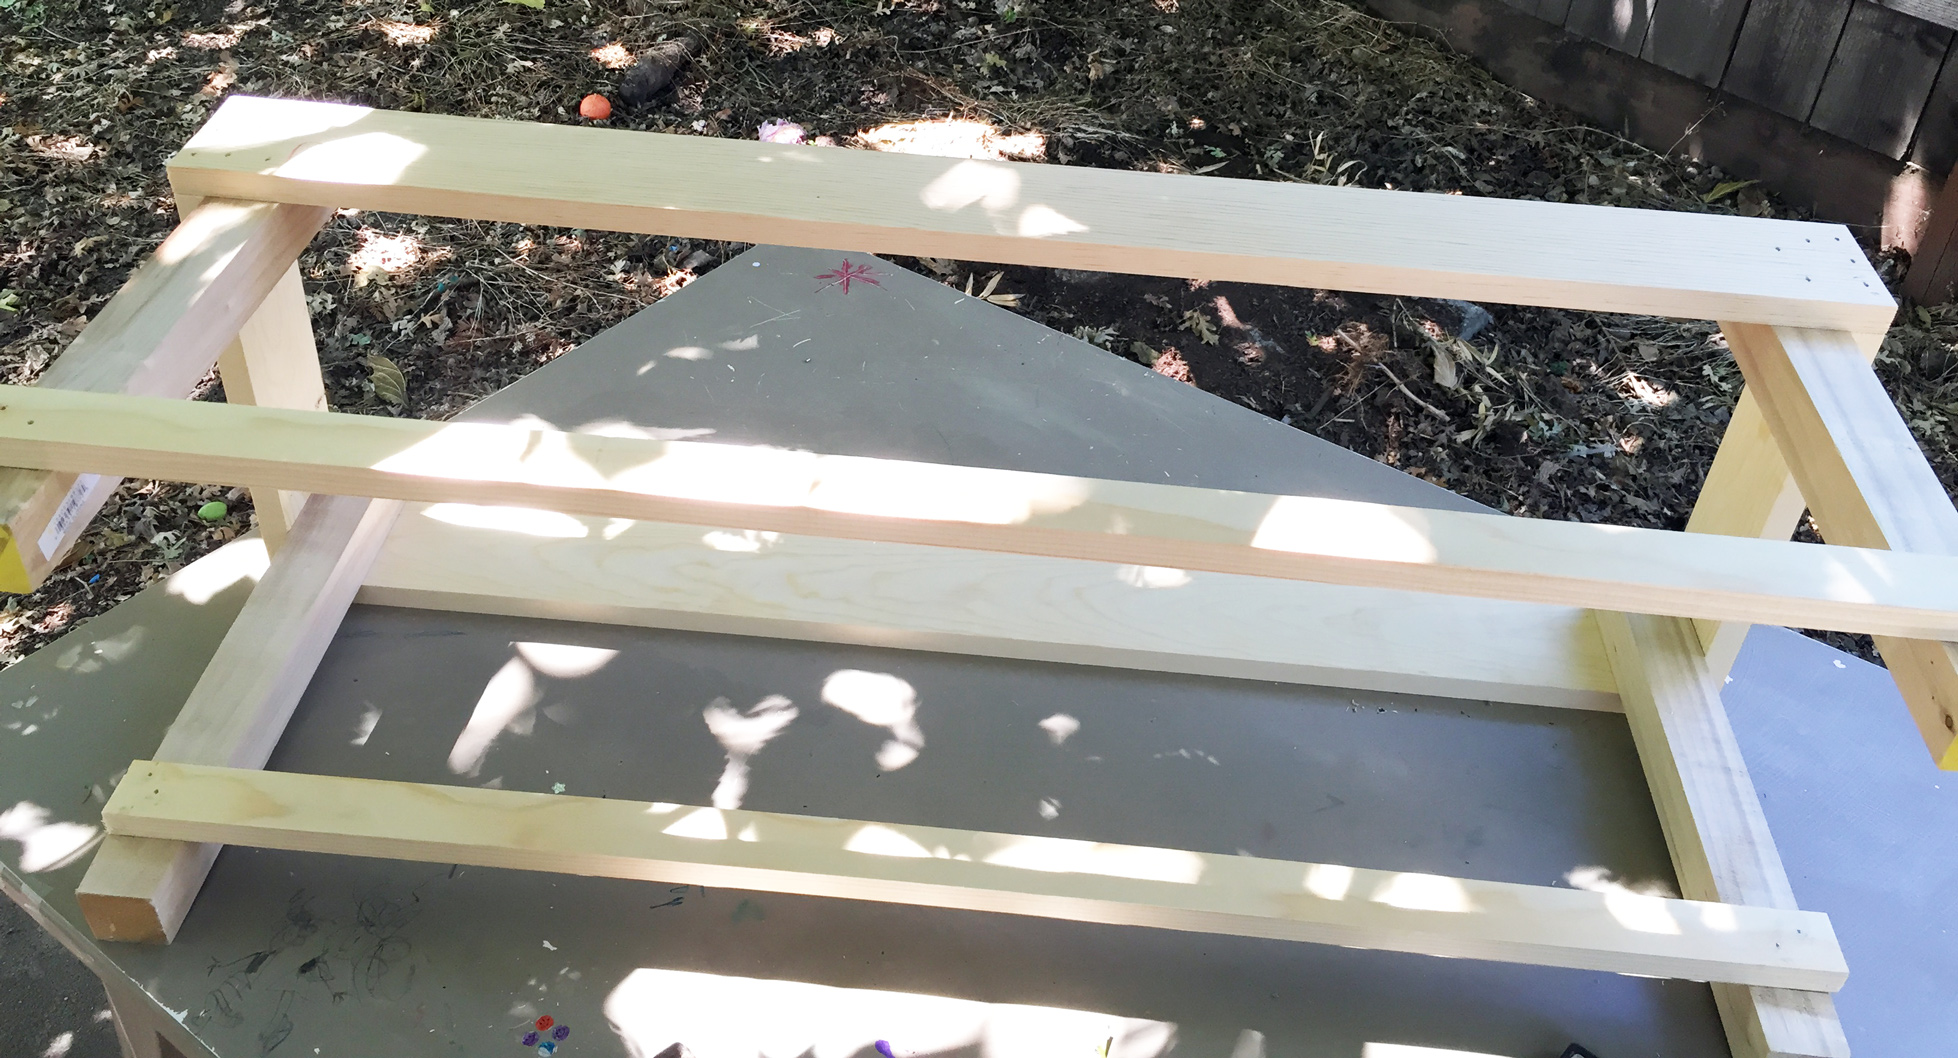
The first step is to build the 1x4 frame. Much like a picture frame, lay out the pieces so that the 12.5" pieces fit between the 40" pieces. Add wood glue and brad nails to secure the rectangular frame.
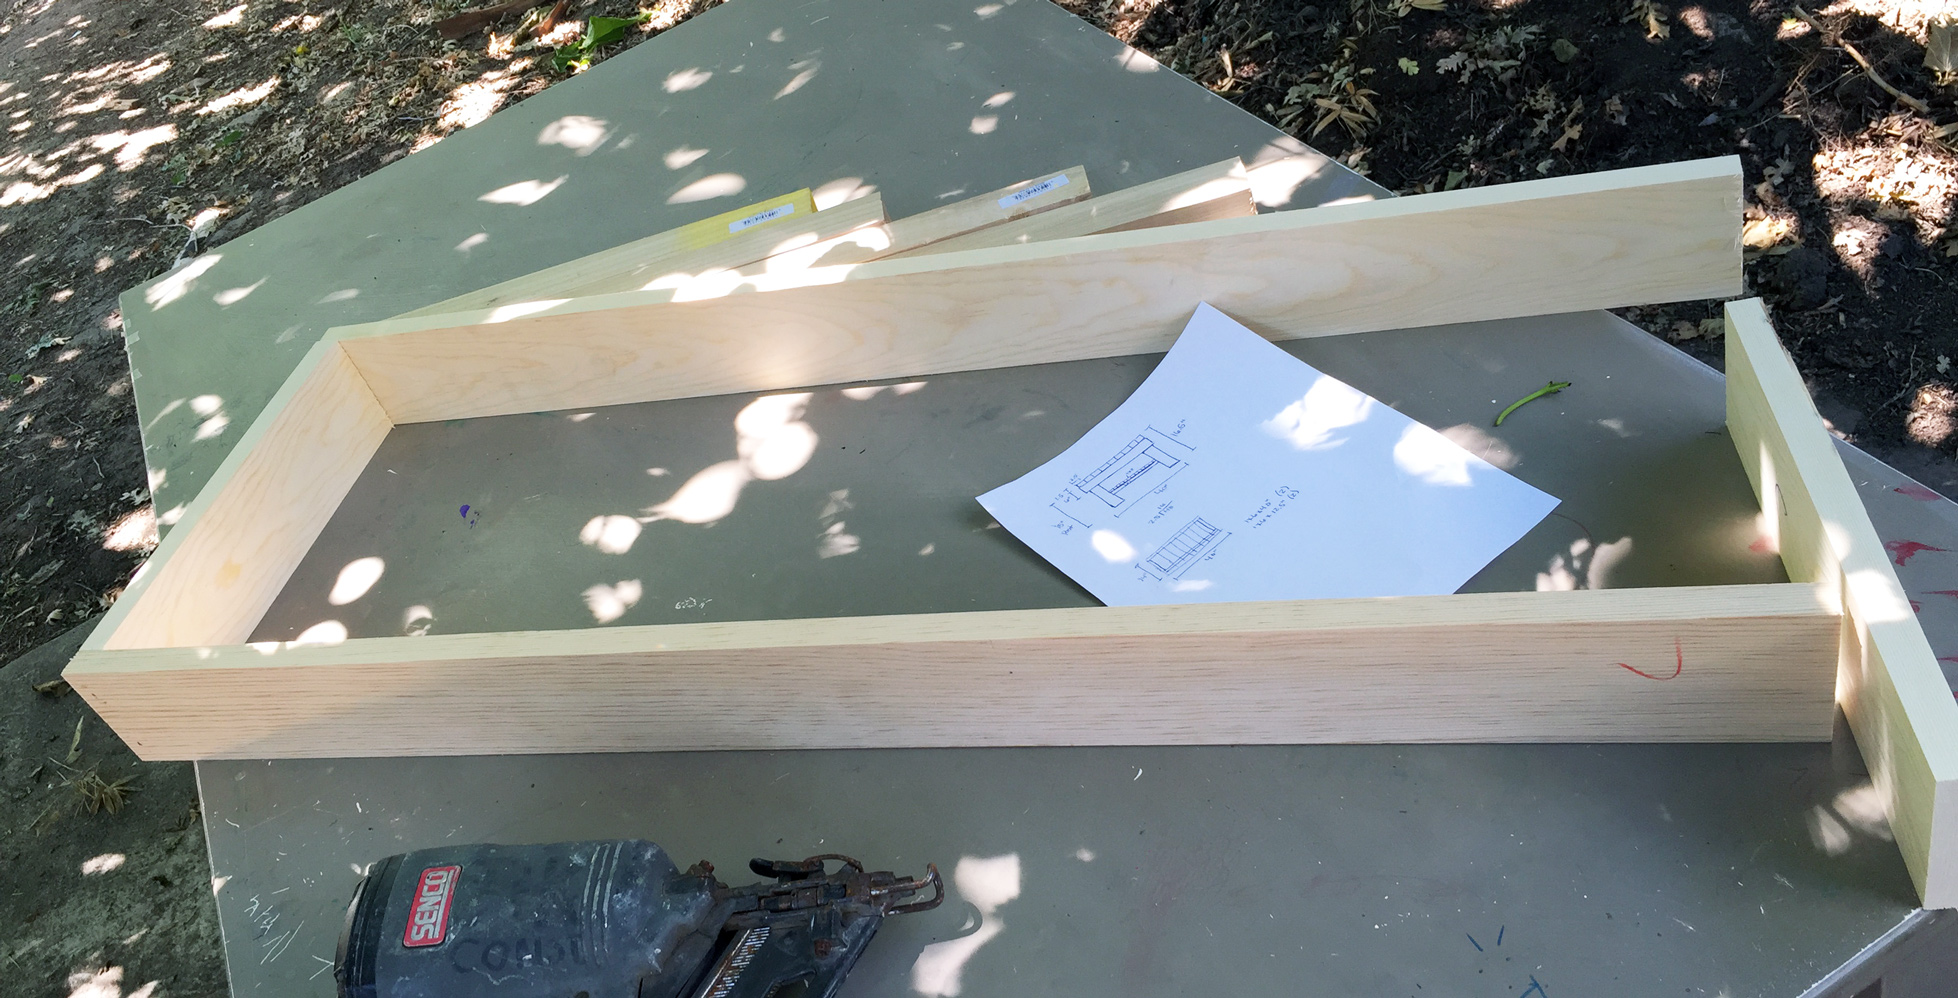
Once the rectangular frame is build add the corner posts and nail to the rectangular frame. The post top should be flush with the top to the 1x4 frame.
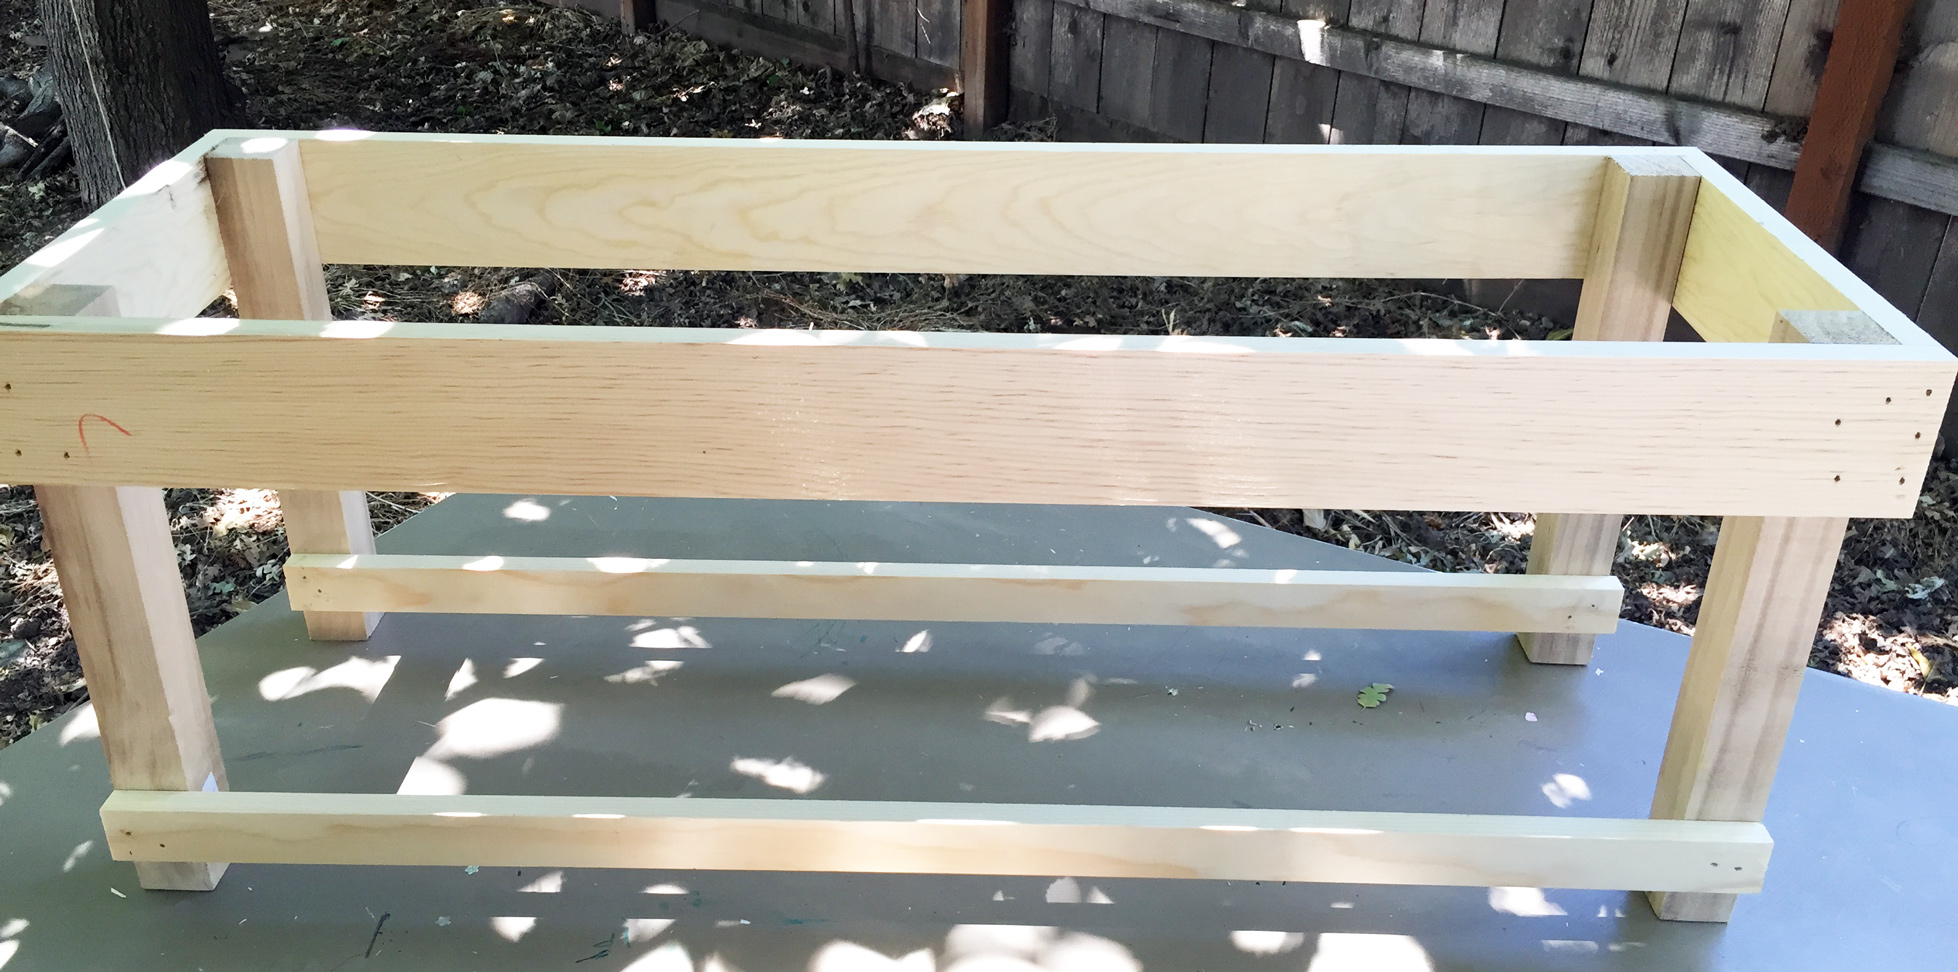
Next you will want to add the support strips for the bench shelf (to hold shoe baskets). Make sure you know which basket you want to use. Double check the placement of the shelf (support strips plus planking thickness) so that the shelf will fit.
We installed one strip on the back side of the post legs so it would be flush with the 1x4 strip above. The other support strip we installed so that from the front of the bench you it would not be so prominent as a design detail.
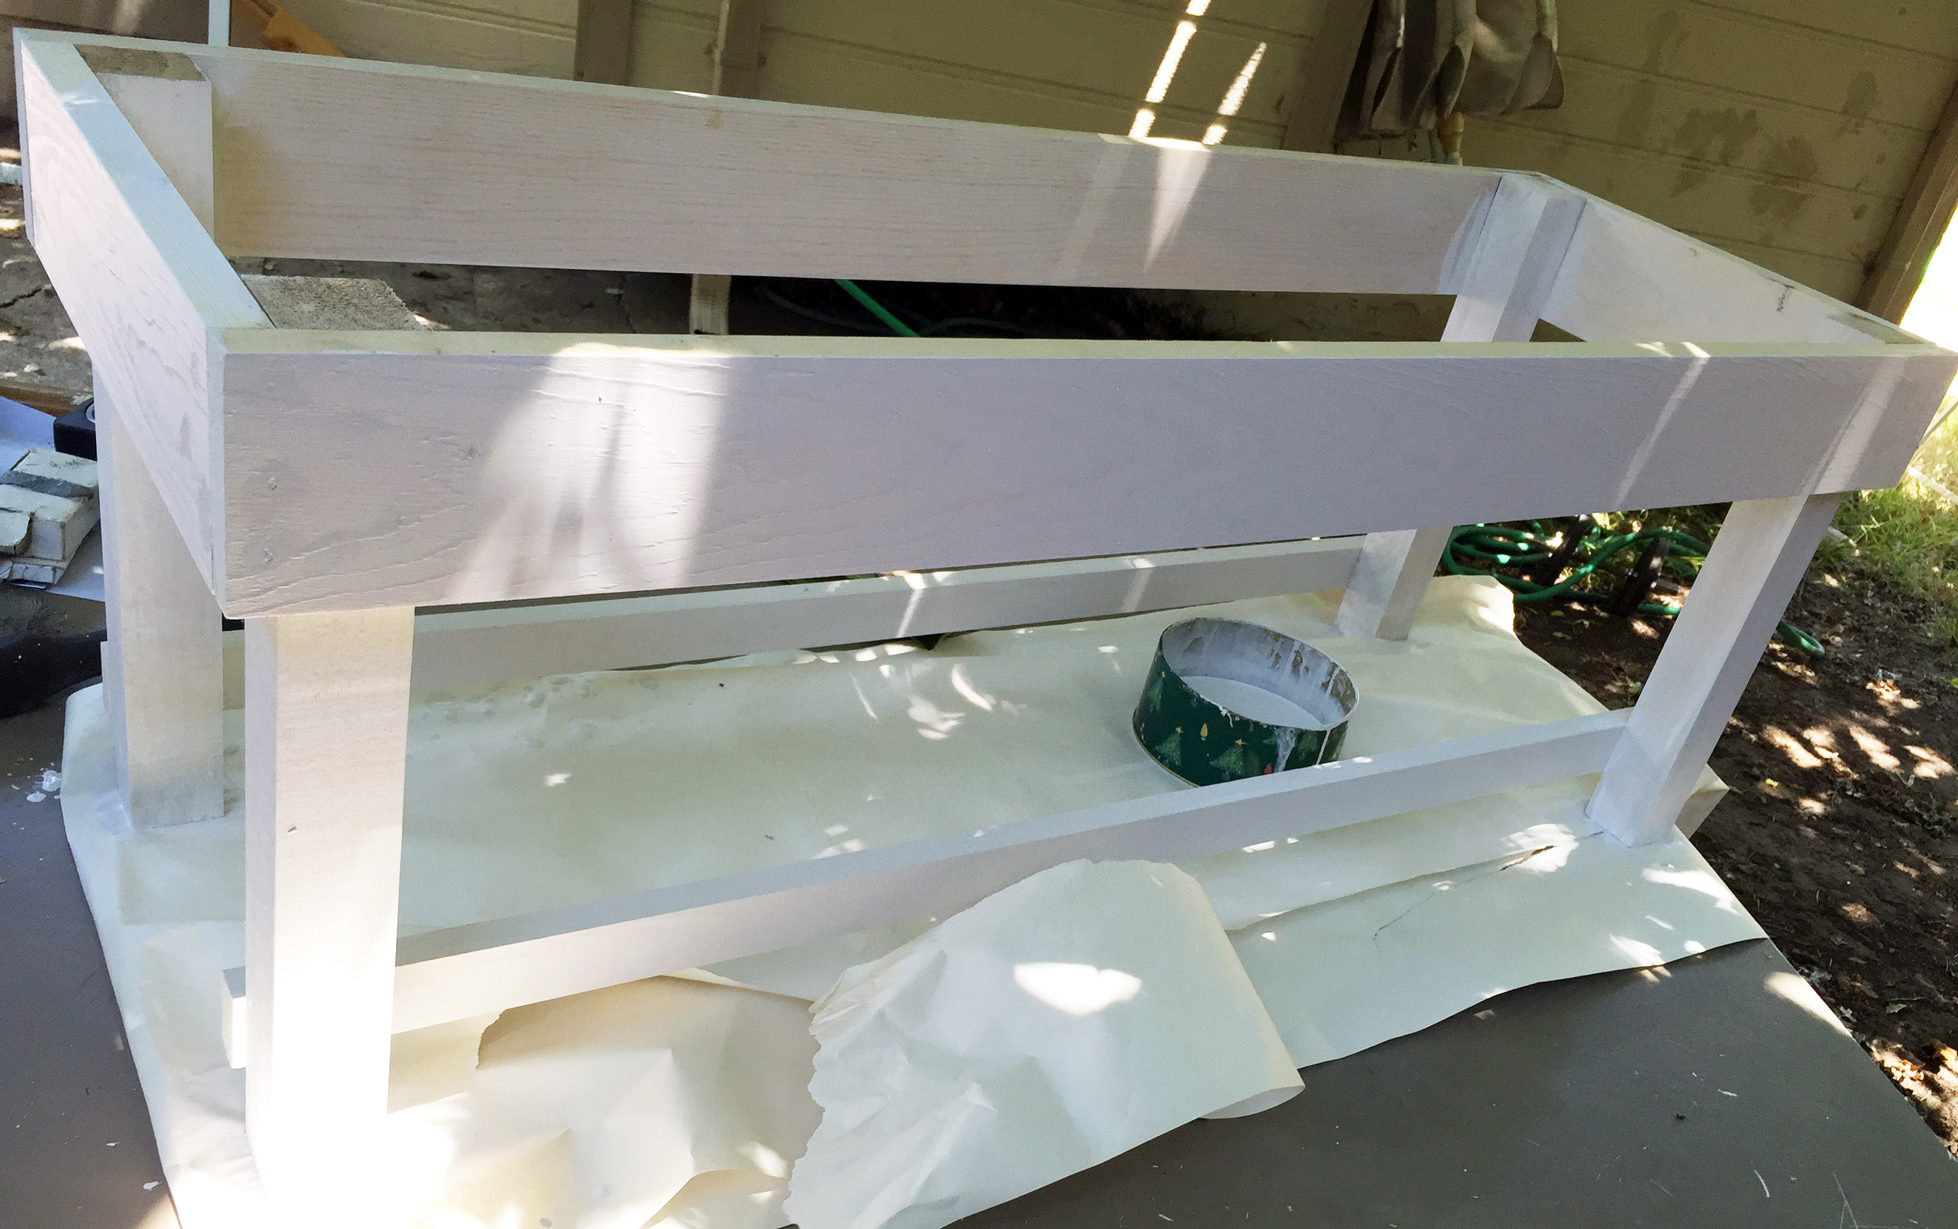
The basic frame is now built. The next step was to white wash it (1/2 paint 1/2 water combo). We applied 3 coats.
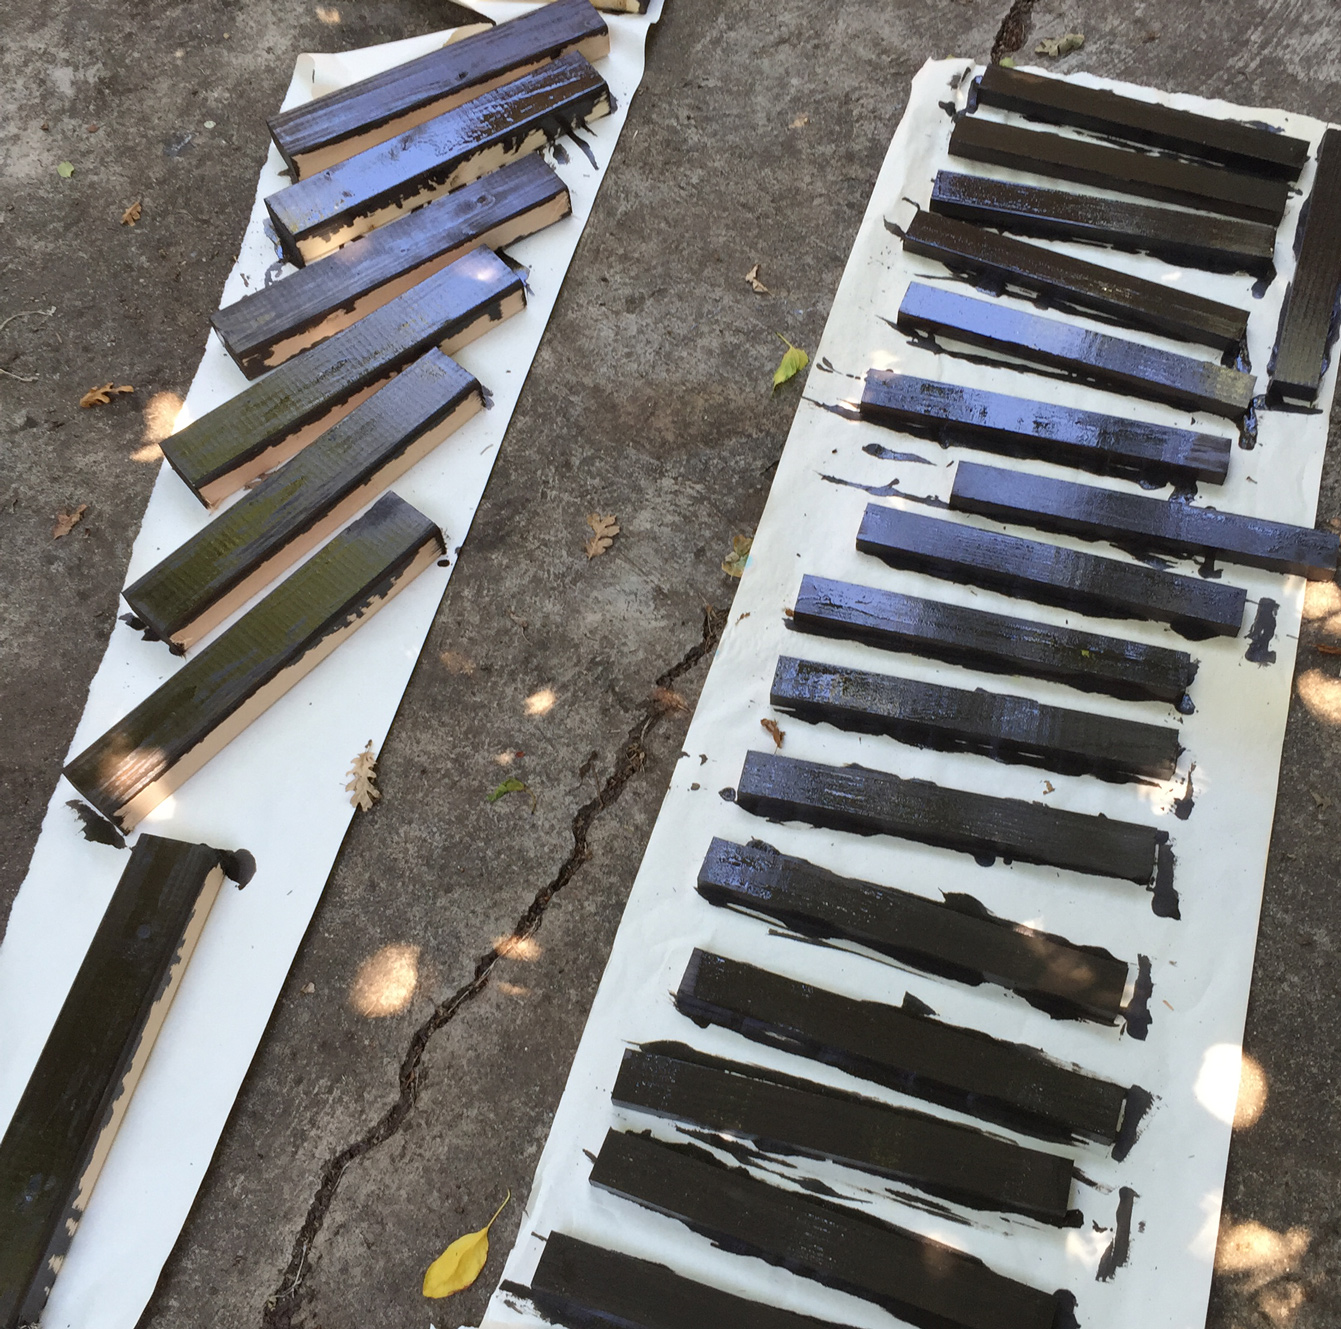
In the mean time we also stained the 2x3 pieces and the 1x2 planks for the shoe shelf.
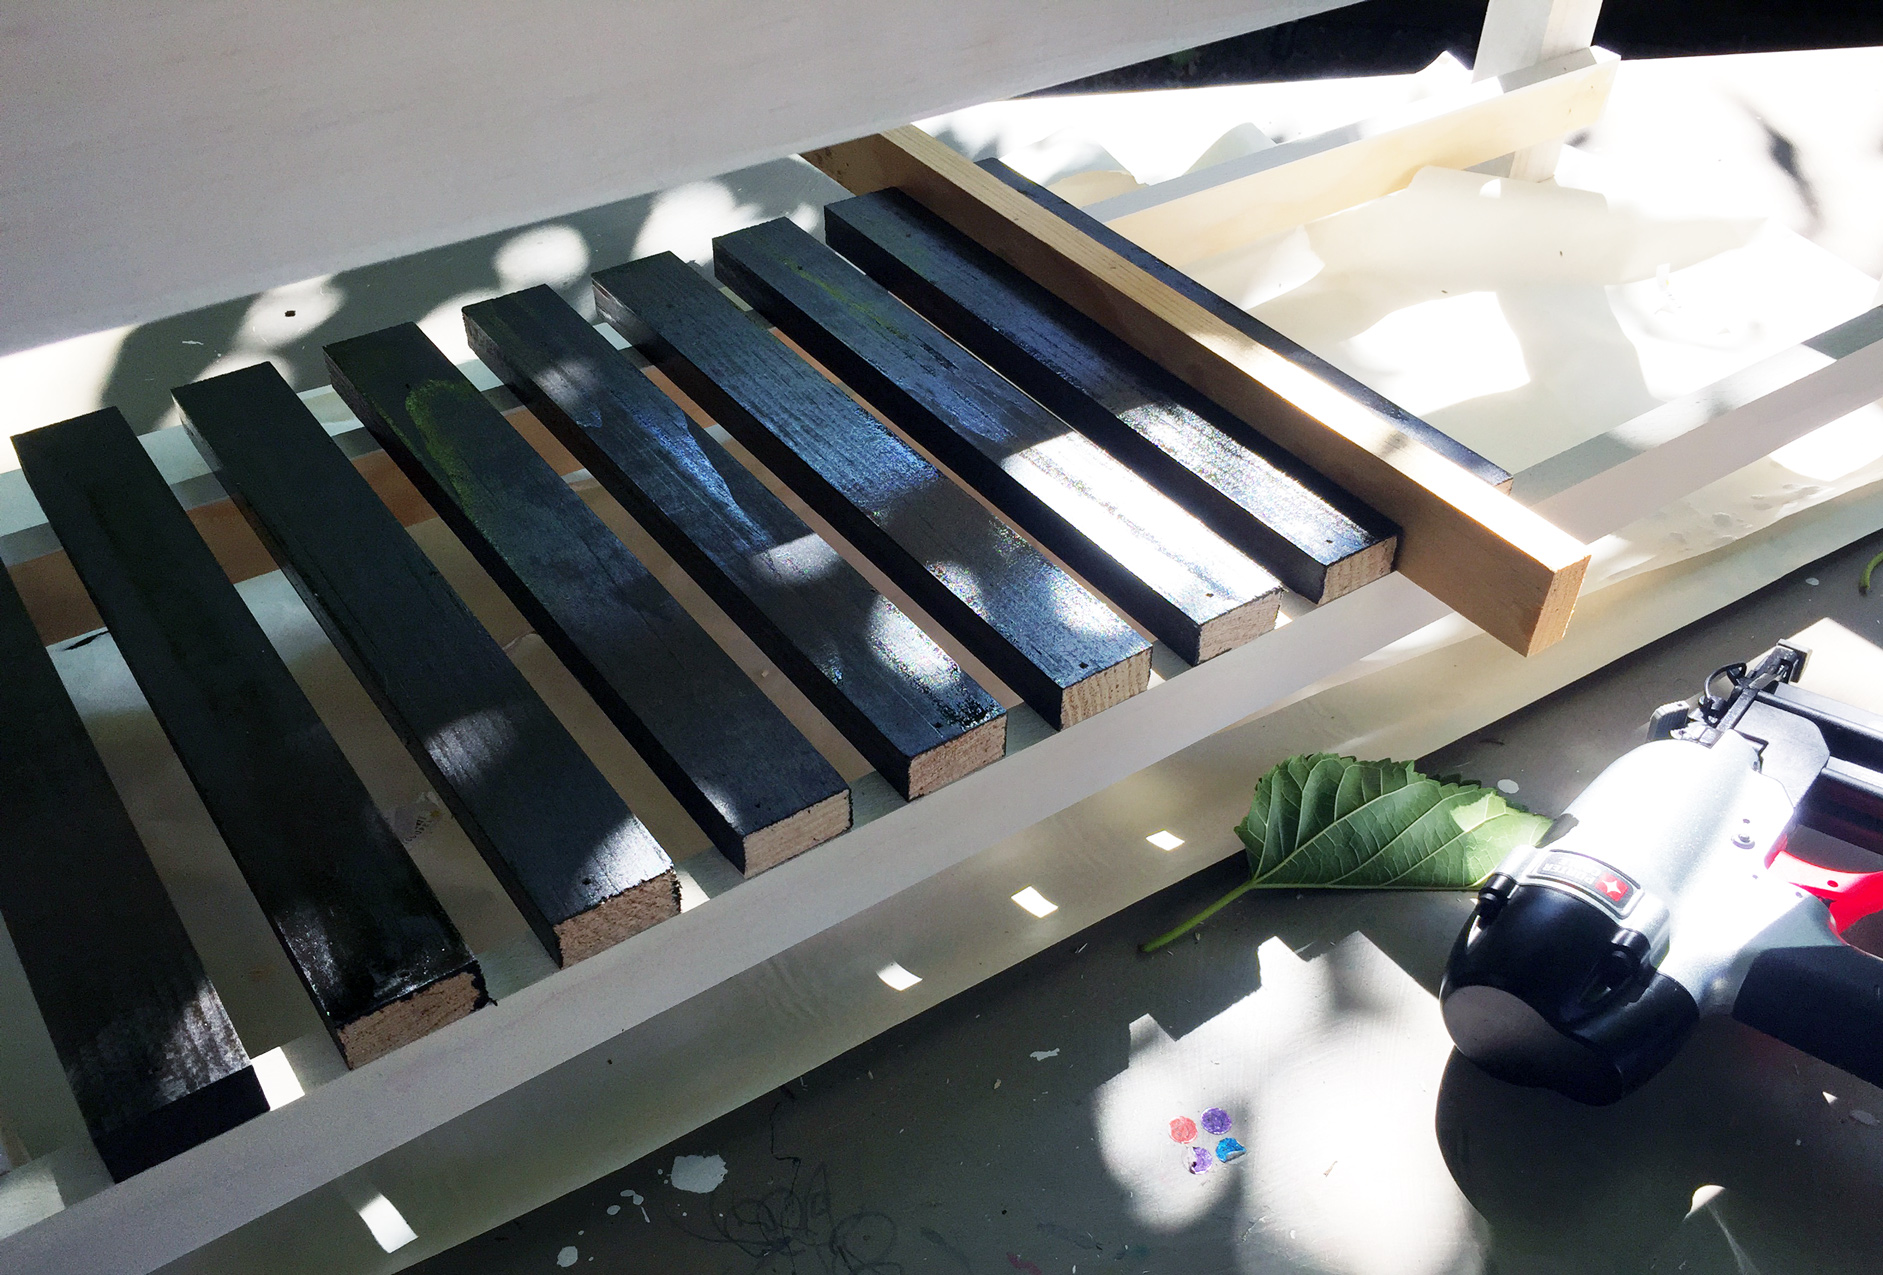
Once it was dried we assembled the planks to the white washed frame. I started with the planks for the shelf. Some of them were hard to get the brad nailer angled right, so it was easier to be able to go in through the top to nail. We also used a 1x2 turned on it's side to create an even spacing between each stained plank.

The last step was to add the top seat 2x3 planks. Make sure to use a long brad nail for this section as well as wood glue . Start on one edge and make sure 3 sides are flush with the 1x4 frame. Glue, nail and repeat.
That's it! Pretty simple design. Even someone new to DIY'ing can tackle this bench.