DIY Magnetic Chalkboard
As a mother of 2 kids, having a place for the kids to play in the kitchen was very important to our Napa Water Tower client. One of her kid-friendly kitchen requests was to incorporate a chalk board or dry erase board into the kitchen design. We found a way to give her not only a chalk board but a magnetic chalk board so letter magnets could be used, as well as additional organizational add-ons such as magnetic chalk cup holders and clips.
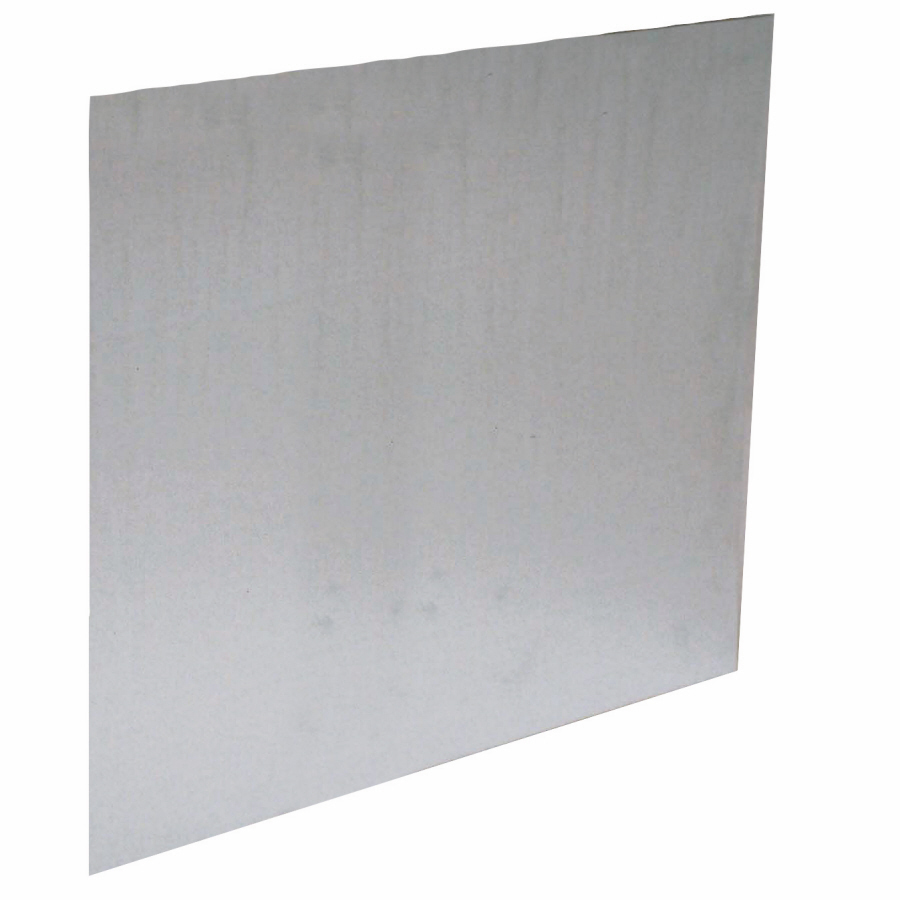
This is definitely an easy DIY project. Anyone can do it with a very minimal amount of tools. We started with measuring the space for the chalk board. In this case, the side of a pantry was the best location for the chalk board. You could add it to a section of unused wall or the side of an island. After determining the size of the side of the pantry, we asked the HVAC installer to cut us a piece of sheet metal the exact size we needed for the chalk board. You could try calling around to HVAC company's or gutter company's to see about purchasing a flat sheet of sheet metal cut to your size requirements. For standard sizes you can get sheets of sheetmetal at lowes or homedepot.
Once you get the sheet metal the next step is to prime it and then paint it with chalk board paint. We used a foam roller and rolled 3-4 coats on one side. Try to keep your strokes going the same direction.

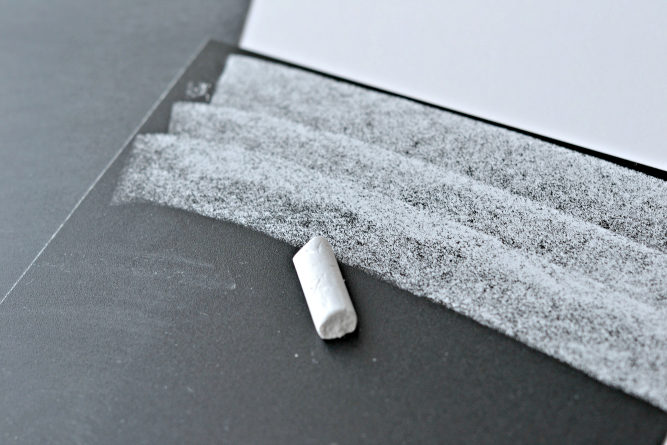
After the chalk board paint has completely covered the sheet metal, you need to prime it with chalk (After manufactures curing time). Roll chalk over the chalk board so it is completely covered with chalk. This keeps it from creating a ghost of your first drawings or letters.
After the chalkboard is primed its now time to install it on your wall. We used a high tack 3M spray adhesive to spray the back of the sheet metal. This helped as a temporary hold while we nailed frame in place, but also keeps the sheet metal from bowing after install. Once the back was sprayed we stuck it on the side of the pantry and then nailed a pre-stained wood frame around it. We used wood trim left over from the custom hood project, but you could use door casing, picture frame moulding or chair rail.
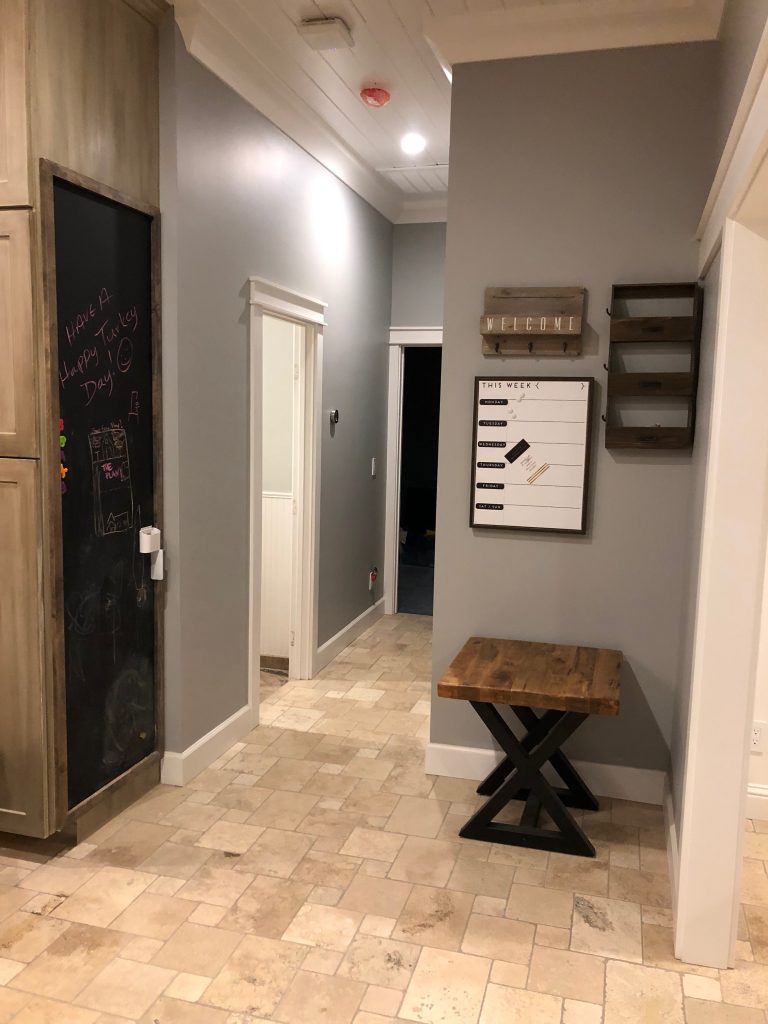
This became such a fun design detail for this family. We hope this tutorial can help you create something fun and unique in your space as well.
